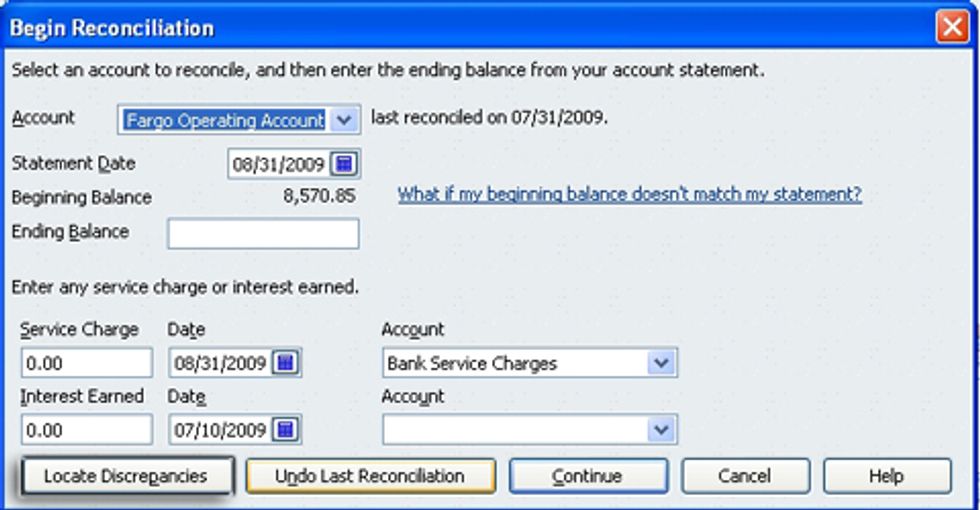
Here’s the scenario. You performed your last bank reconciliation correctly and your ending balance agreed with the bank statement. However, as you begin to reconcile the current month's statement, you find your beginning balance is wrong.
These discrepancies are caused by changes to transactions that have been cleared in previous account reconciliations. A search to identify a such a change can be time consuming and frustrating. QuickBooks monitors these changes for you. Follow these steps quickly identify and correct the problem.
Select the “Locate Discrepancies” icon as shown below.
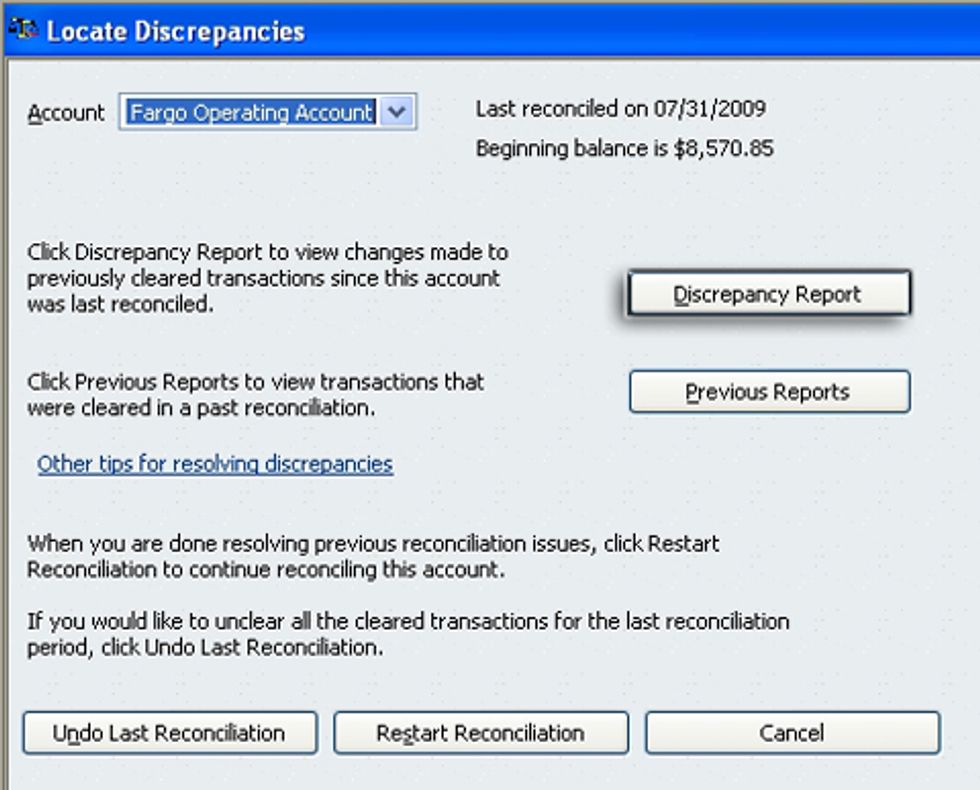
Select the “Discrepancy Report”
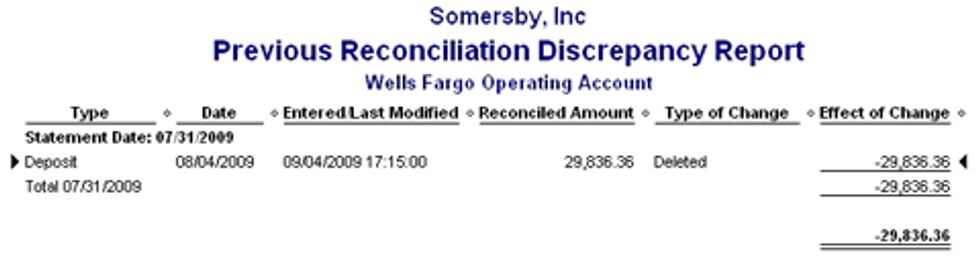
All changes and deletions performed on previously cleared transactions are identified in the resulting report. All you have to do now is restore these transactions to their original cleared state. In case below, we had a deposit accidentally deleted. We have the date amount and action that caused the discrepancy.
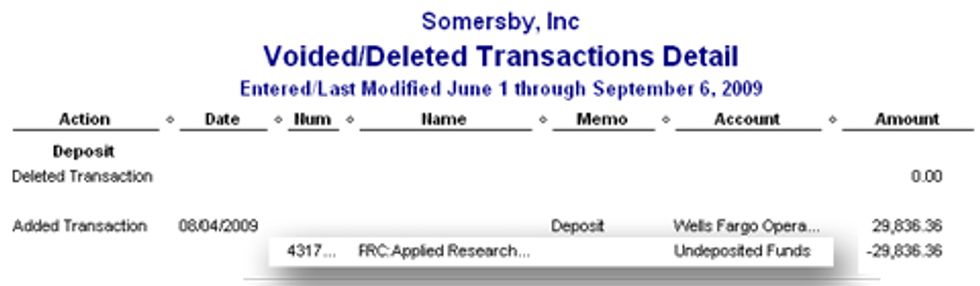
If we need more detail, we can find this transaction in the deleted items detail report.
We re-enter the transaction and, then, record it as a cleared transaction to correct our balance forward for the current reconciliation. To accomplish this, we re-run the account reconciliation for the period this transaction initially cleared in, enter the ending balance per that bank statement, select that item as cleared, and click reconcile.

Our balance forward is now corrected and we are ready to begin the current month reconciliation.
Robert Guild is certified QuickBooks ProAdvisor in Austin, TX who conducts CPE courses for CPAs and individual training and group classes to QuickBooks users. His company at www.QBCoach.biz, maintains a sixteen-station QuickBooks lab, providing hands-on training. You can contact him directly at rguild@QBCoach.biz or follow him on twitter at QBPro