Log in to your account
Once you have been approved as an AllBusiness Experts contributor and given a WordPress user account, log in using the user name and password that you have received from the Editorial team. If you have not received this login, check your spam folder.
Once you log in to WordPress, you can edit your bio information if needed as well as set some of your preferences. You do this by clicking on Profile in the WordPress menu, as shown below. If you do not see this menu, see whether Collapse menu has been selected. You can unselect it by clicking on the icon of an arrow in a circle, and the left-hand menu will appear.
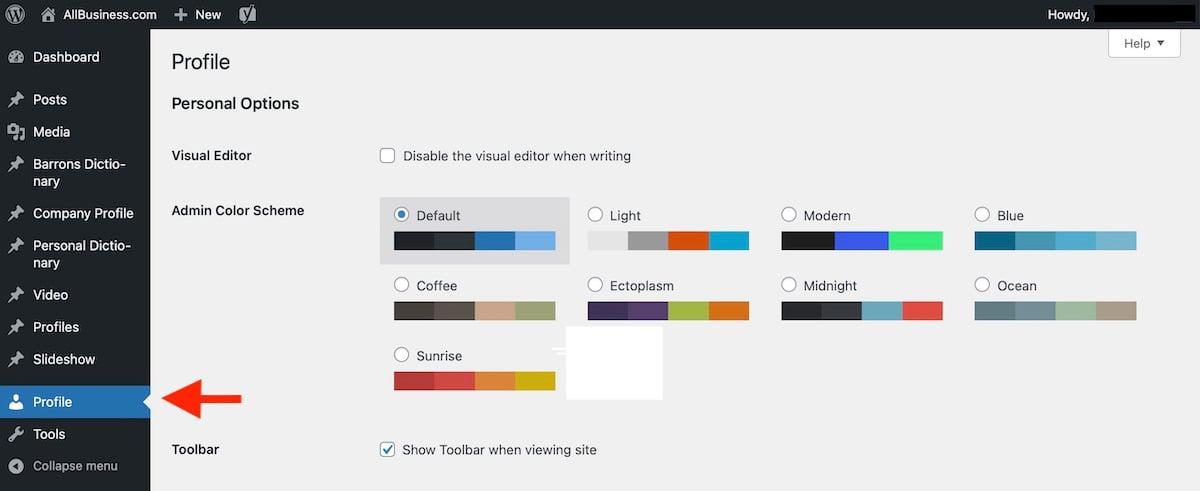
Personal Options
- Visual Editor. If you are well versed in using HTML and only want to create your articles in HTML and not be bothered with a visual editor, go ahead and check this box. Note that if you leave this unchecked, you can still edit your post in HTML, so leaving this unchecked is what most people will do.
- Admin Color Scheme. Choose your preferred color scheme. There is no functional difference, only a personal preference.
- Toolbar. Select this if you want to view the AllBusiness.com website with the WordPress toolbar displaying across the top of the site (black bar), which makes it fast and easy to go back and forth between the website and the author interface. The default selection should be to check this.
Name
- Username. This is the name that we gave you when we first set you up in the system, and it is typically your first and last name with a space between the two. This is the username that you will use when logging in to the system. This username CANNOT be changed. If for some reason you really don’t like the username we provided, we can delete your account and add another one with your preference.
- First Name. Your first name
- Last Name. Your last name
- Nickname. Even though this is a required field, it’s not used anywhere in the system. Putting in your first and last name here is sufficient.
- Display name publicly. Select the pull-down menu to choose how you would like your name to be displayed on the website. Best to choose “[first name] [last name]”
Contact Info
- Email. Your email address. You can change this at any time.
- Website: Add the full URL of your own website. This will become a clickable link below your name on your author profile page.
- Pinterest. Add the full URL of your Pinterest page if you have one.
- Areas of Expertise. Add one or a few specific terms indicating your areas of expertise (for example: Entrepreneurship, Startups, Accounting). This information will display below your name on your author profile page.
- Expert Company. List the name of your company.
- Expert Title. List your professional title.
- Twitter Username. Add the full URL of your Twitter page if you have one.
- Facebook URL. Add the full URL of your Facebook page if you have one.
- LinkedIn. Add the full URL of your LinkedIn profile if you have one.
- Google+ URL. This social media platform is defunct, leave this field blank.
- legacy asset location. Leave this field blank.
- legacy object/contributor id. Leave this field blank.
About Yourself
- Biographical Info. Write whatever information you would like displayed about you on your articles. This box supports HTML coding so if you want to include text formatting or links, use the appropriate HTML encoding. In general, we are looking for 2-4 sentences on your background, expertise, and experience. Note that this component does not allow for paragraph breaks, so your full bio will be a single paragraph, therefore it’s best if your bio is short and succinct.
- Profile Picture. This is where you can update your headshot if you like. Keep in mind that the author headshot should be square with a tight crop on your face.
Account Management
- New Password. Change your password any time you like. For security purposes, it’s a good practice to do this on a regular basis.
- Sessions. This section will allow you to log out everywhere else if you change your password.
Application Passwords
For the most part, you can ignore the information from this section onward.
Creating New AllBusiness Posts